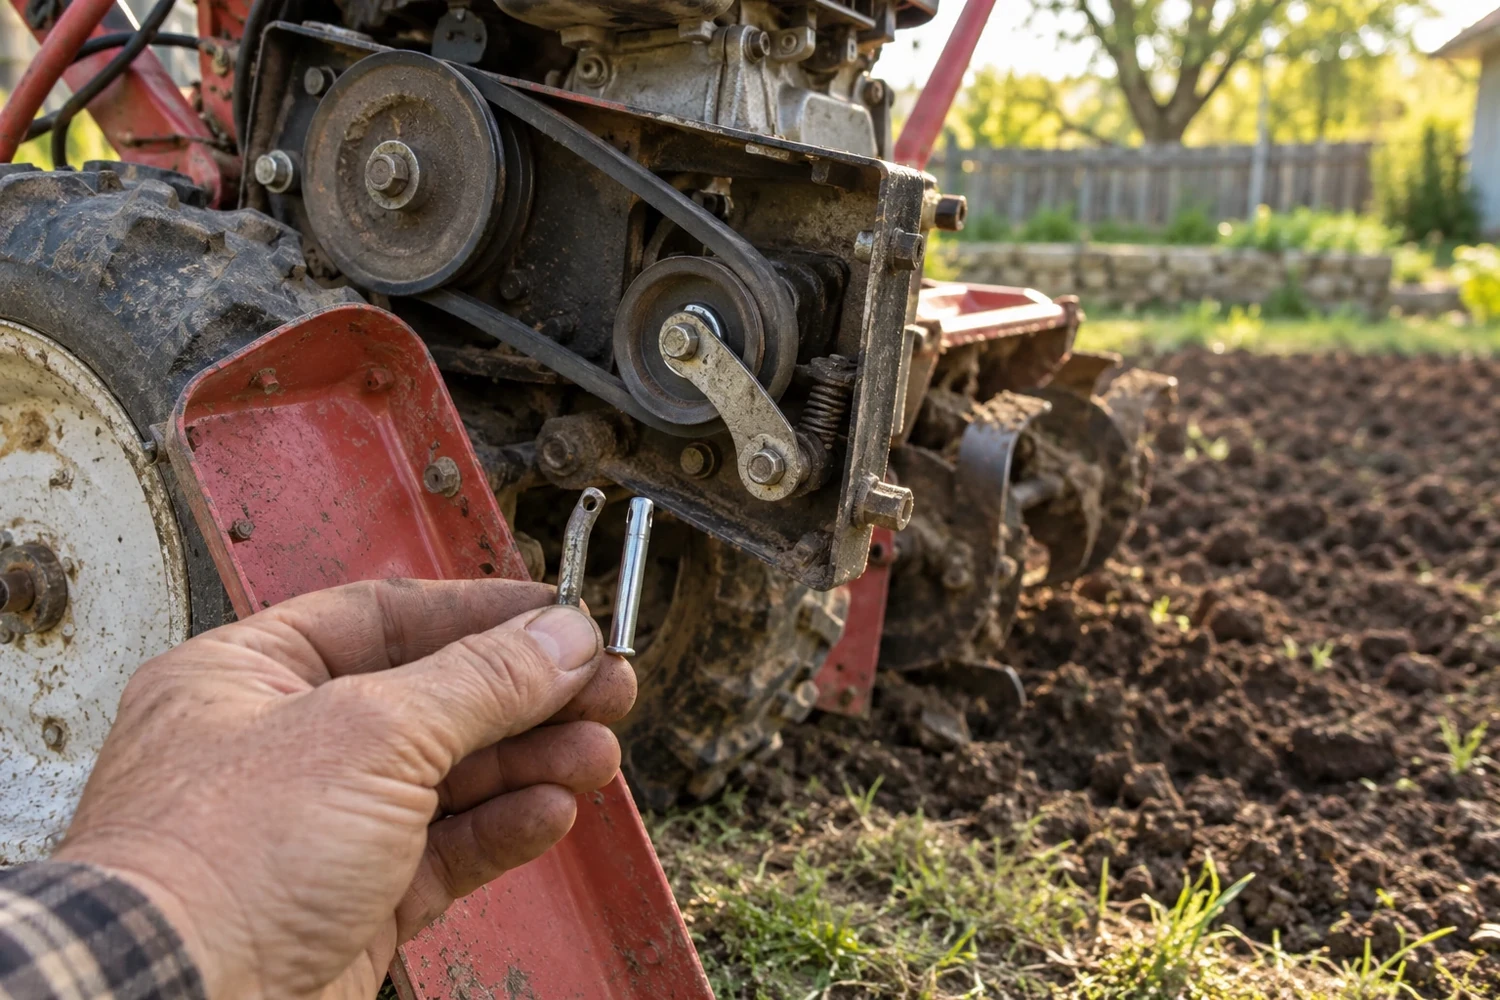
Quick answer: A tiller engine that starts and runs normally while the tines don't turn at all, or turn only weakly under load, points to the drive belt, the idler that tensions it, or the clevis pin connecting the tines to the driveshaft — not the fuel or ignition system. This is the same logic as a riding mower with a healthy engine and a dead deck: the fault is downstream of a confirmed-working power source.
Start with a hand test, engine off
Shut off the engine and disconnect the spark plug wire before doing anything else. On most residential tillers, the tines are not permanently keyed to the driveshaft — they're secured with a clevis pin specifically so the connection can shear or slip under excess load. With the plug wire disconnected, try turning the tines by hand. If they turn freely with no resistance from the driveshaft at all, the clevis pin has likely sheared or is missing; if they're rigid and won't turn by hand either, the problem is further upstream in the gearbox or belt path.
Check the clevis pin — and don't substitute a bolt
The clevis pin is a deliberately weak connector, similar in purpose to a snow blower's shear pin: it's designed to break under an abnormal load — striking a buried rock, root, or piece of debris — specifically to protect the more expensive gearbox or transmission from that shock instead. If you find a sheared or missing clevis pin, replace it with the correct clevis pin, not a generic bolt; a bolt strong enough to survive the same impact transmits that shock straight into the gearbox the next time it happens.
Inspect the drive belt for slack or wear
With the belt cover removed and the engine still off, check the drive belt's tension and condition. It should sit securely on its pulleys with little to no slack — a belt that's stretched, glazed, cracked, or simply loose can slip badly enough under the load of actual tilling that the tines barely turn, even though they spin freely by hand with no load on them. A belt that looks fine sitting still can still be too loose to transmit real power once soil resistance is added.
The idler assembly does the actual tensioning
The idler pulley's job is to tension the drive belt, and it's normal for this assembly to need periodic adjustment as the belt wears and stretches slightly over a season of use. If the belt itself looks undamaged but still feels loose on its pulleys, check the idler adjustment per the tiller's manual before replacing the belt outright — a belt that's fine but under-tensioned by a maladjusted idler will show the same slipping symptom as a genuinely worn belt.
Check the gearbox oil level as well
Below the belt and clutch, the tine gearbox itself typically holds a small volume of gear oil that lubricates the internal reduction gears connecting the driveshaft to the tine shaft. A gearbox that's low on oil, or that has never had its oil checked since purchase, can run hot and bind under load in a way that looks similar to a slipping belt from the outside, even though the belt itself tests fine. Most tiller manuals specify a check interval and the correct oil grade — it's a five-minute check worth doing whenever tine performance under load is in question and the belt and clevis pin both check out.
Putting the sequence together
- Confirm the engine runs normally on its own, independent of the tines.
- With the engine off and plug wire disconnected, try turning the tines by hand.
- If they spin completely free of the driveshaft, check and replace the clevis pin with the correct part.
- If they're rigid or turn only with resistance, remove the belt cover and inspect belt tension and condition.
- If the belt looks fine but is loose on the pulleys, check the idler assembly's adjustment.
- If the belt and clevis pin both check out but tines still bog down under load, check the gearbox oil level.
Working in that order avoids replacing a belt that was never the problem, or missing a sheared clevis pin because the belt was checked first.
Keep spare clevis pins on hand, not just spare belts
Because the clevis pin is a deliberately sacrificial part, hitting even one buried rock or root during a normal tilling session is enough to shear it, and it's a genuinely common wear item on any tiller used in rocky or previously unworked soil. Keeping a couple of the correct replacement pins in a toolbox alongside the tiller means a mid-season shear becomes a two-minute fix instead of a delayed trip to a parts counter, and it removes the temptation to grab whatever bolt is closest just to finish the job.
Repeated shearing is a signal, not just bad luck
If a tiller has sheared its clevis pin repeatedly in a short span, that's worth treating as its own signal rather than continuing to simply swap pins and move on. It usually means either the tilling depth is set more aggressively than the ground currently being worked can handle, or the operator is pushing the tines through visible obstructions the equipment is deliberately designed to stop at rather than fight through — not a sign that the replacement pins being purchased are the wrong grade or quality. Reducing tilling depth by a notch or two on rocky or previously unworked ground is often the more durable fix than continuing to replace pins at the same aggressive setting.
New ground shears more pins than established garden soil
Tilling a new or previously unworked plot for the first time is when pin shearing shows up most often, since old construction debris, buried roots, and rocks are far more common in soil that hasn't been cultivated before. Expect a noticeably higher shear rate for the first pass or two on new ground, and treat that as a normal, expected part of breaking in a new plot rather than a sign of a mismatched or defective tiller. Once a plot has been worked over a season or two and the larger buried debris has been cleared out, shear rates on that same ground typically drop substantially, which is itself a useful sign that the soil has been properly broken in.
Rear-tine and front-tine models diagnose slightly differently
Front-tine tillers place the tines ahead of or below the wheels and typically rely on a simpler direct or single-belt drive path, which makes the clevis-pin-and-belt sequence in this guide apply almost exactly as described. Rear-tine models, especially counter-rotating designs, often add a second gearbox stage and sometimes a separate drive belt for the wheels distinct from the one driving the tines — on these machines, confirm which belt actually serves the tines before assuming a belt problem affects both systems equally, since a rear-tine tiller can have fully functional wheel drive while the tine drive belt has failed, or the reverse. Check your specific model's parts diagram if you're not certain which belt does which job before removing covers or ordering a replacement part.
Mini-tillers and cultivators built around a single small engine directly coupled to the tine shaft, without a separate belt-and-idler system at all, are the exception to most of this guide — on these compact machines a tine that won't turn with the engine confirmed running usually points straight at the direct-drive coupling or an internal gear rather than any belt, since there's no belt in the drivetrain to begin with.