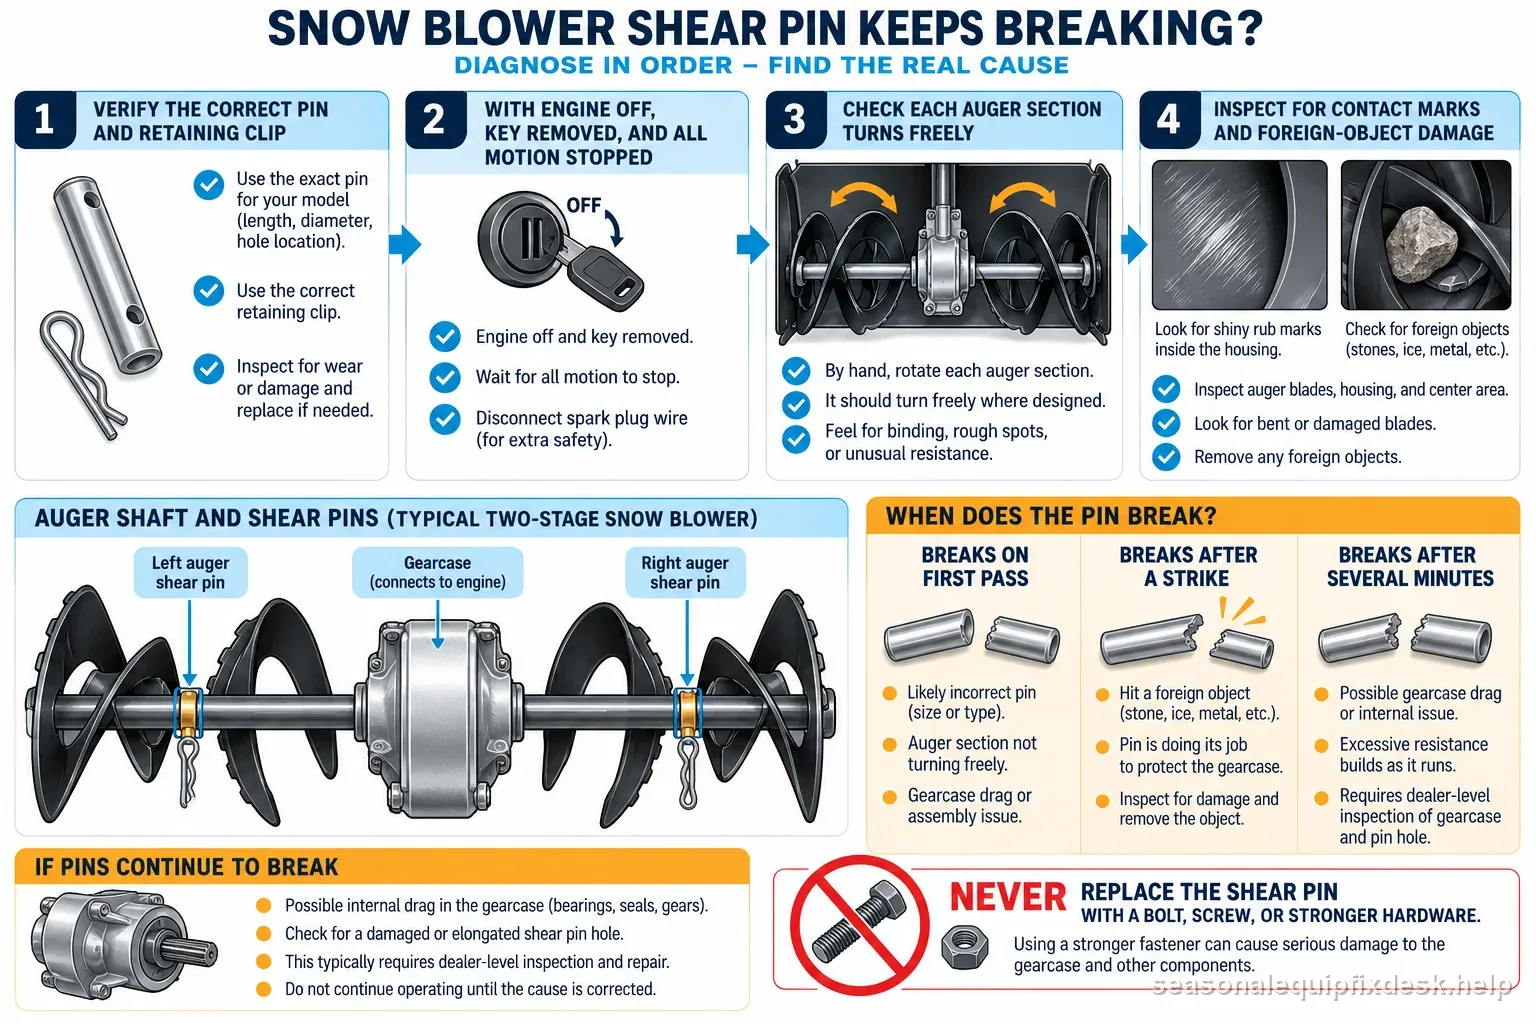
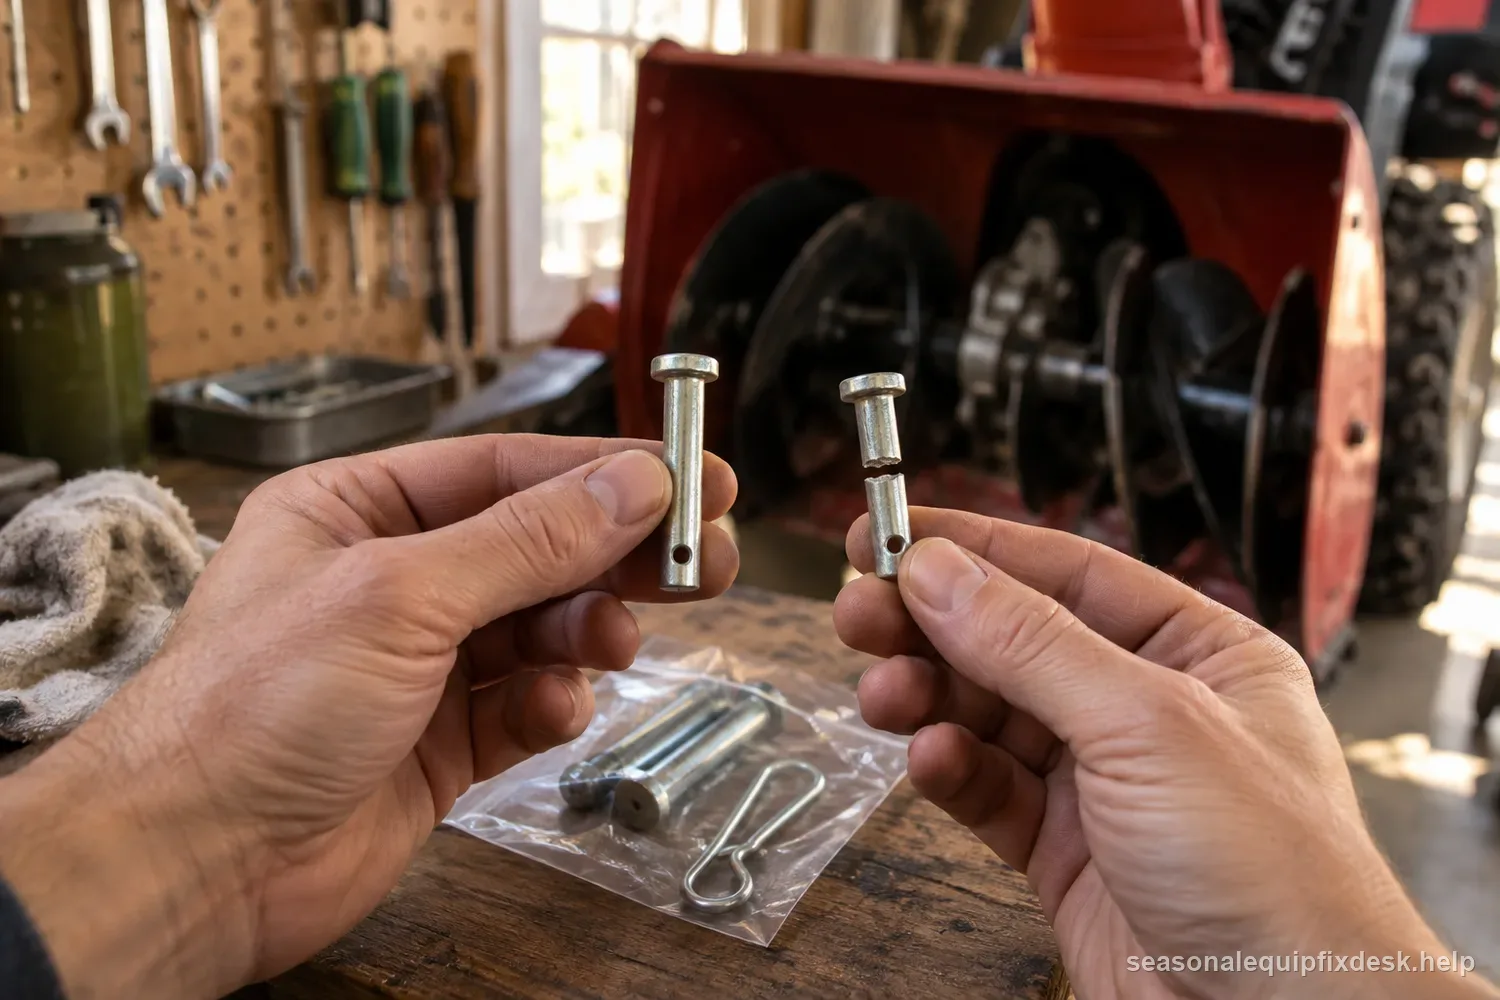
Quick answer: A shear pin is supposed to be the weak link. Repeated breakage means the auger is repeatedly seeing abnormal torque, the wrong fastener is installed, or the auger/shaft/housing geometry is no longer free. Do not replace the protective pin with an ordinary hardened bolt.
Safety before inspection: Release the auger control, stop the engine, remove the key, wait for every part to stop, and disconnect the spark plug or battery as the model manual directs. Keep hands and feet out of the auger and chute; use the supplied clean-out tool for packed snow.
| Break pattern | What it may mean | Next step |
|---|---|---|
| One pin breaks after striking an object | Protective fastener may have done its job | Remove the obstruction and inspect for damage before fitting the specified part |
| Repeats in clean, light snow | Binding, misalignment, wrong fastener, or gearcase drag | Stop replacing pins; inspect the system or arrange service |
| Same side fails each time | Local auger, shaft, support, or housing issue | Record the side and inspect visible contact or damage after isolation |
| Breaks during no-load engagement | Immediate binding or incorrect part is possible | Stop; do not continue test runs |
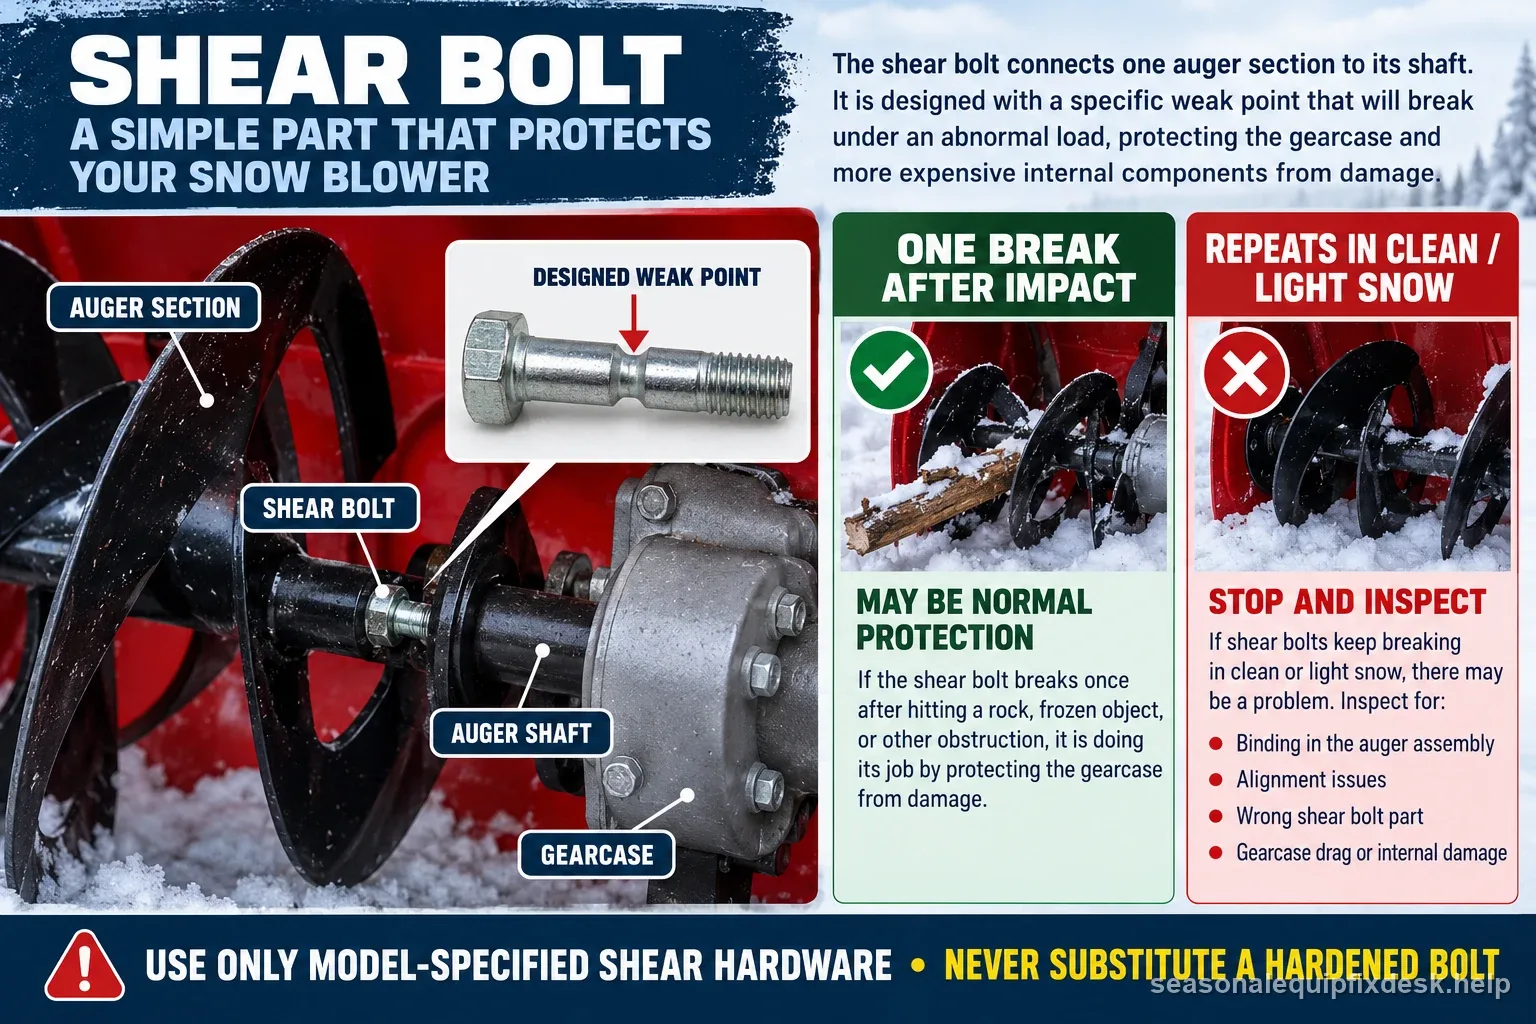
Ariens and other manufacturers specify model-specific shear hardware for exactly this reason. The correct diagnosis asks why the overload keeps returning.
Confirm the fastener before diagnosing the machine
Compare the installed bolt or pin with the exact parts list. Diameter alone is not enough; groove, material, nut, and tightening method may be part of the engineered failure point. Ariens’ current operator material, for example, calls for its specified OEM shear bolts and a model procedure for installation.
If a hardware-store bolt has been substituted, correct that first. If the proper pin then fails again, the machine has given you useful evidence that a mechanical load remains.
Make sure each auger section is free on the shaft where designed
On designs where the auger tube is intended to rotate relative to the shaft after the shear fastener is removed, rust can seize the two together. That defeats some of the protection and can concentrate shock elsewhere. Follow the lubrication and free-movement procedure in the exact manual; do not assume every auger design is meant to spin freely in the same way.
Seasonal corrosion is especially plausible when the machine was stored wet or with road salt packed around the shaft.
Look for contact marks, not just broken metal
Rotate the isolated auger system only as the manual allows and watch the clearance to the housing. Fresh scrape marks, a bent flight, displaced bearing, or elongated shear holes can make the auger bind once per revolution. A pin that always breaks after a few turns may be reporting that repeating contact.
Do not straighten a severely bent rotating assembly by trial-and-error while it is installed. Bent shafts and cracked welds deserve service inspection.
Repeated foreign-object strikes leave a history
Gravel, frozen newspapers, ice chunks, edging, and hidden debris can shear a pin without any machine defect. If failures happen only at the end of a gravel drive or in refrozen berms, change the operating path and inspect the housing after each event.
After a hard strike, replace the pin only after confirming the auger and impeller turn without an obvious bind. A second immediate failure is a stop signal, not bad luck.
Gearcase drag moves the problem upstream
If correct hardware, free auger sections, and housing clearance all check out, roughness or tight spots in the gearcase/shaft system become more important. Oil leakage, metal contamination, cracked casting, or resistance at the gearbox input are reasons to stop owner-level work.
A shear pin should protect expensive components; defeating it or repeatedly feeding pins into a dragging gearcase can turn a contained fault into a larger repair.
| What happened | Likely meaning | Response |
|---|---|---|
| One break after a known impact | Protective pin may have worked as designed | Clear obstruction; inspect before using specified replacement |
| Repeats in clean, light snow | Underlying binding, alignment, hardware, or gearcase fault | Stop replacing pins and arrange inspection |
| Same side fails repeatedly | Local auger, shaft, support, or housing issue | Record the side and inspect visible damage after isolation |
| Breaks at no-load engagement | Immediate bind or wrong fastener possible | Stop the test and service the fault |
How to prove that the cause—not just the pin—was fixed
- Install only the specified shear hardware using the model procedure.
- Restore guards and confirm the auger stops when its control is released.
- If the exact manual permits, test from the operator position with guards installed and everyone clear; stop at any abnormal sound or vibration.
- Make a short pass in light clean snow.
- Inspect the pins and housing again before returning to dense or icy conditions.
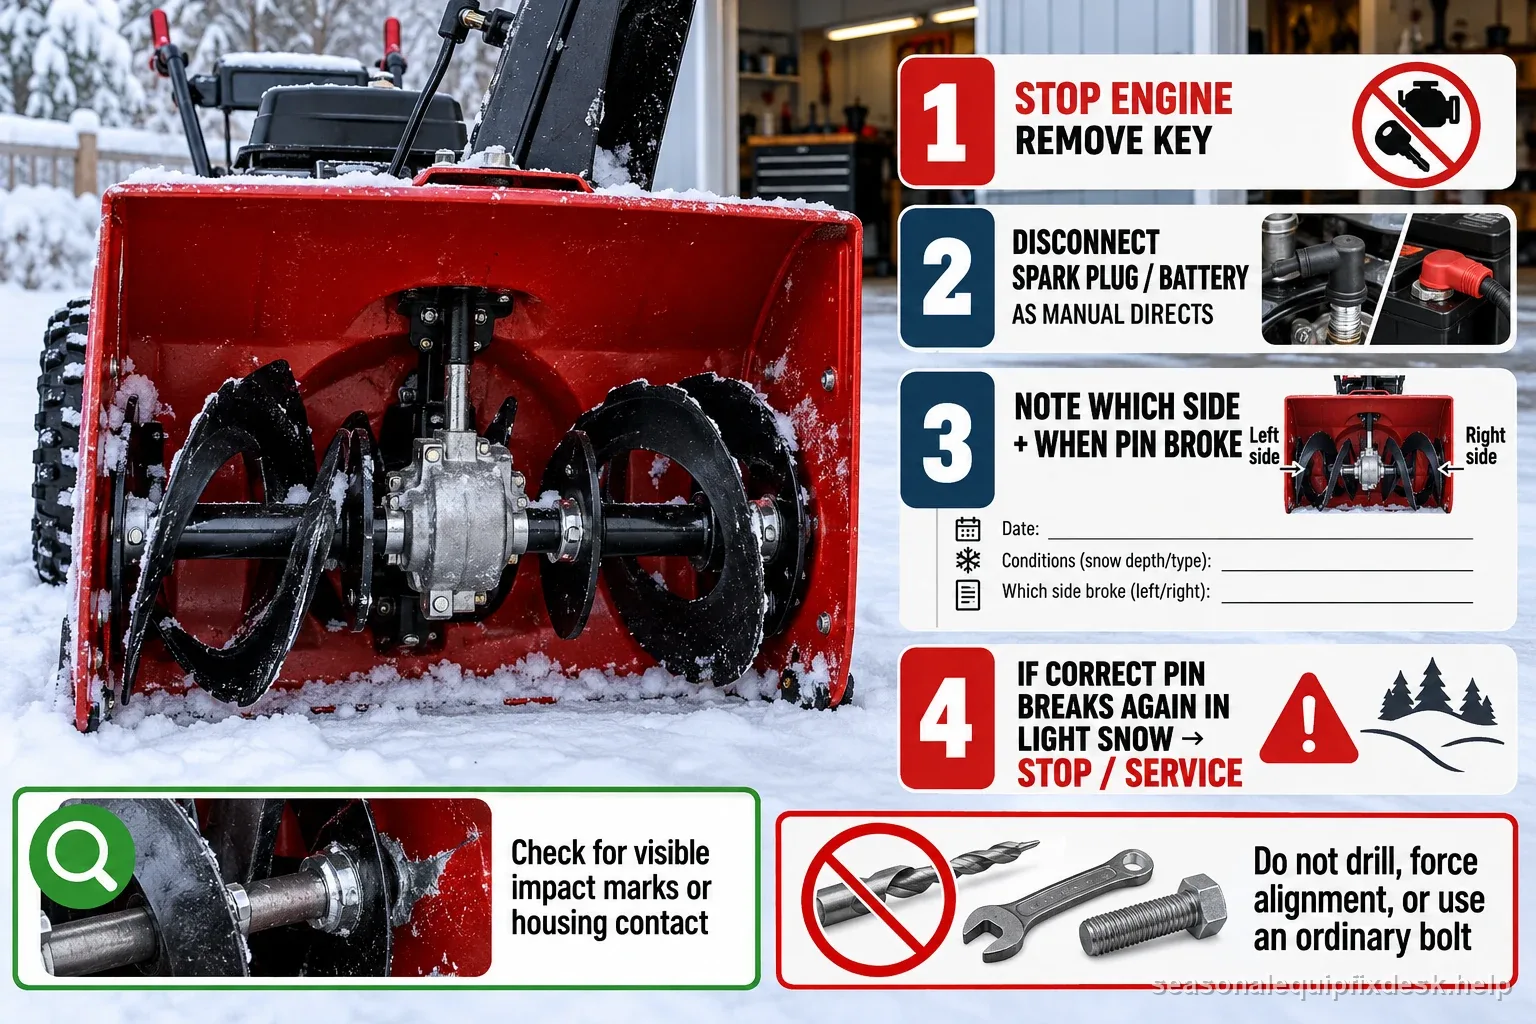
If another pin breaks during the no-load or light-load test, do not keep replacing it. The remaining bind, alignment issue, or drive fault needs inspection.
The timing of the break is diagnostic evidence
- Breaks as soon as the auger is engaged with no snow: look hard for binding, misalignment, wrong hardware, or rotating contact.
- Survives no-load but breaks in light clean snow: check drive shock, auger freedom, impeller/gearcase resistance, and housing alignment.
- Breaks only after impacts or dense frozen berms: operating load and foreign-object strikes become more plausible.
- Always breaks on the same side: inspect that auger section, its shaft relationship, bearing/support, and housing clearance rather than replacing both sides.
- Exact fastener part number and machine model
- Which side failed and how many times
- Whether the auger had hit an object or was in light snow
- Any bind, scrape mark, bent flight, elongated hole, or gearcase leak
- Whether the failure happened during normal, manual-approved operation
Hole alignment should be natural, not forced
With the engine secured against starting, the shear-bolt holes should align in the normal service position described by the manufacturer. If a pry bar, hammer, or heavy twisting is needed to make them line up, find out why before installing a new pin. Bent auger tubing, shaft displacement, packed debris, or gearbox damage can all turn forced alignment into another immediate failure.
Use the exact manufacturer-specified shear bolt and nut. Ariens warns against substituting ordinary hardware because the designed fastener is part of the protection system.
Inspect the pin hole and shaft relationship after several failures
Repeated breaks can damage more than the replaceable fastener. With the machine safely disabled, look for elongated holes, burrs, offset holes, mushroomed edges, or an auger section that no longer sits squarely on the shaft. A new pin installed through damaged or misaligned holes may be loaded in bending before the auger ever reaches snow.
If the holes no longer align cleanly in the normal service position, do not enlarge them with a drill or substitute a smaller bolt. That changes the designed load path. Repair the underlying shaft, auger, bearing, or gearbox alignment according to the model service information.
Keep a simple failure log: which side broke, whether the machine was empty or loaded, what object or snow condition was present, and whether the auger turned freely after shutdown. Three identical failures on the same side under light load are much stronger evidence of a machine fault than three unrelated impacts in heavy plowed snow.